Event organizers are an entrepreneurial bunch — it comes with the territory. And in 2025, organizers are diversifying their revenue streams like never before.
Tickets remain the number one source of income for organizers, but nine in 10 are making money elsewhere, too. Merchandise, food and drink, and ‘day-of’ ticket sales are the top event revenue sources for organizers, according to an Eventbrite survey conducted in 2023.
So if you’re an organizer based in the US or Canada, and want to get serious about maximizing revenue opportunities at your events, look no further than Eventbrite’s handy new Tap to Pay contactless payments.
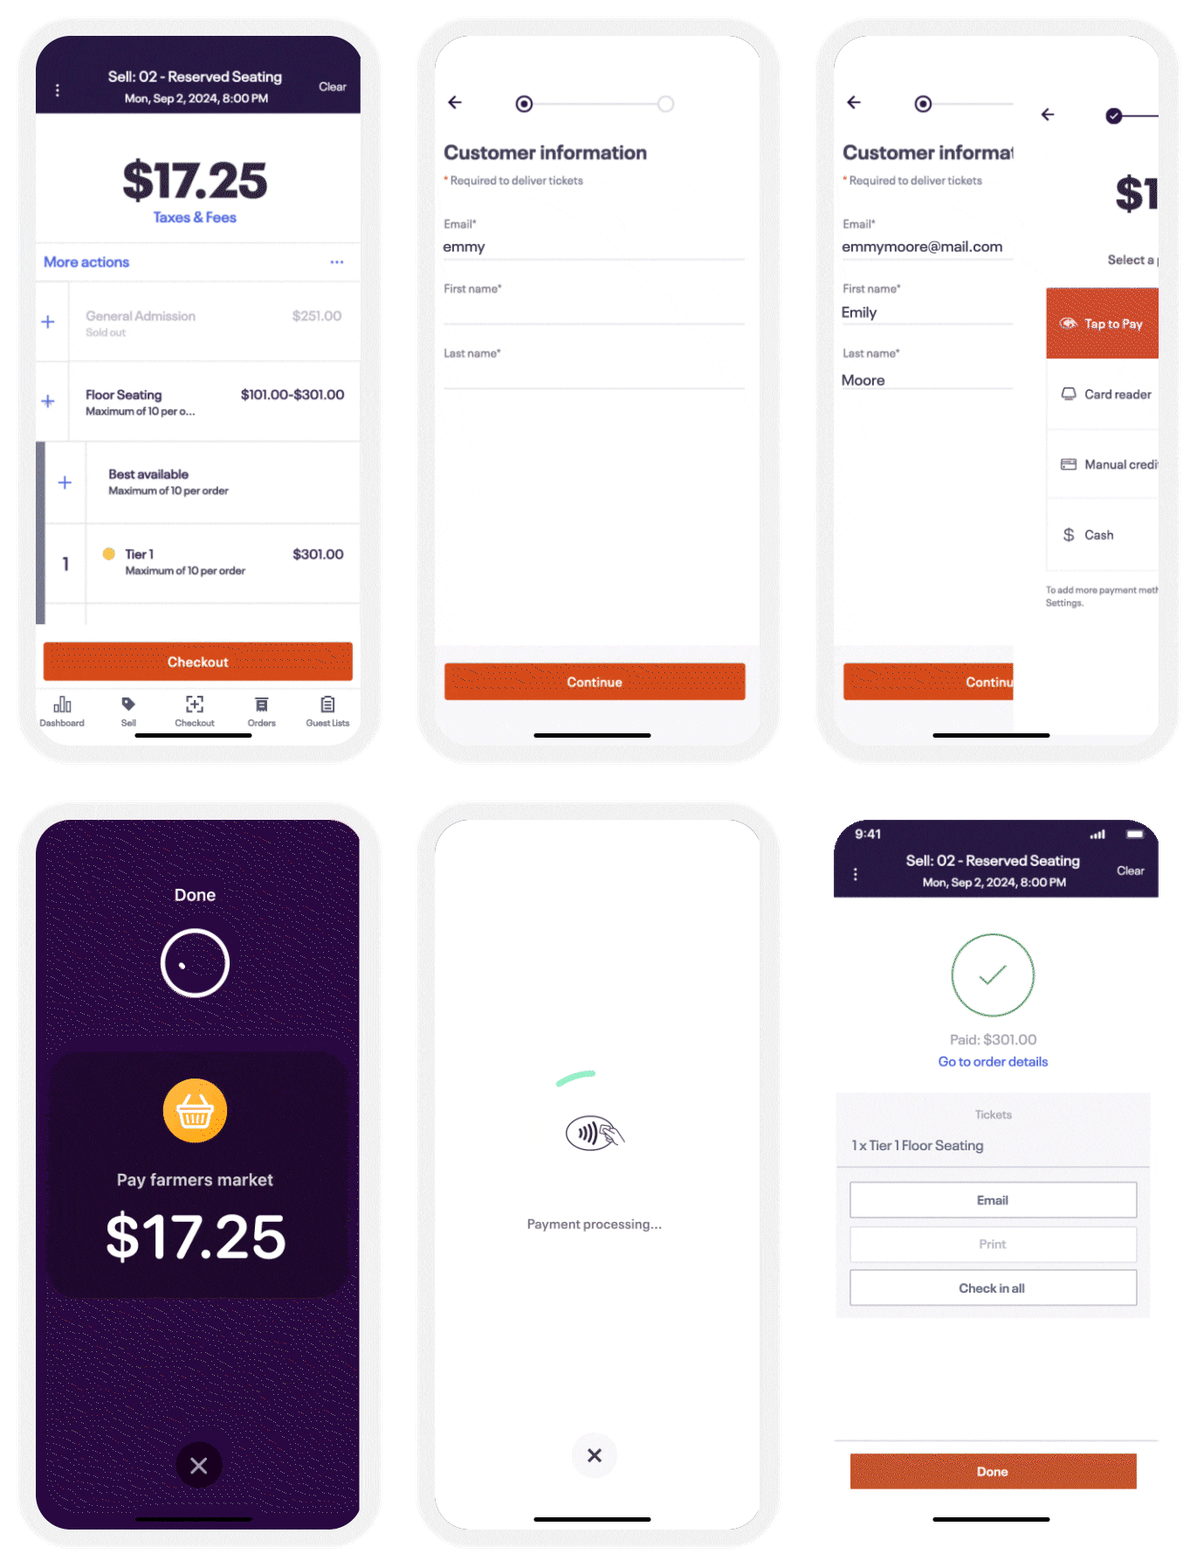
Tap to Pay (TTP) seamlessly integrates into the Eventbrite Organizer app on your phone. With Tap to Pay, you can accept cashless payments at the door (and beyond) in seconds, increase your revenue, and have all your attendees flaunting their new merch on social media to tell their friends how amazing your event was.
Why should I use Tap to Pay?
Let’s be honest: hardly anyone carries cash anymore. In fact, the majority of consumers use either physical (54%) or virtual cards (36%) as their primary payment method — just 9% regularly use cash. People also tend to spend more on credit or debit cards, with the average purchase costing $112 compared to an average $22 cash spend.
But we know card machines can be costly, time-consuming to set up, and not to mention clunky. Tap to Pay saves you time and money by streamlining the process of accepting contactless payments directly on your Android or iOS mobile device through the Organizer app, without the need to purchase any additional hardware.
With payments coming through the app where you already manage all the details and insights around your events, you won’t have to waste your time reconciling payments.
In fact, with records of what merchandise and concessions customers bought at your event going into the same app that manages all your end-to-end event needs, you’ll be able to build a better understanding of what people are eager for more of.
How to set up Tap to Pay
Tap to Pay is right in your Organizer app – that’s part of its charm. It can be set up in minutes once you follow a few easy steps and you can start accepting payments right away.
Enable Tap to Pay by finding the banner at the top of the Organizer app home screen.

If the banner does not appear, then:
- Tap the menu button in the top left.
- Select Device settings.
- Select Payment methods.
- Activate Tap to Pay.
- Accept the requested permissions.
Note: This feature requires permission to access location tracking, bluetooth, and NFC. Activating Tap to Pay will take up to a minute to complete.
If the Tap to Pay option doesn’t appear in your app, confirm you meet the requirements for this feature.
Take payments at your event
Once you’ve activated Tap to Pay, you’re all set to start accepting payments on the door.
When you sell tickets at your event, select Tap to Pay as the payment method. Then hold the attendee’s payment method to your device to take payment. (*Note: Payments through Interac cards in Canada are not supported.)
A confirmation screen will appear to confirm the transaction is complete.

Remind me again why I need Tap to Pay
So, to recap: Stripe’s Tap to Pay is now available to all event organizers in the US and Canada. It allows organizers to accept in-person payments directly on their mobile devices, and will be available on Android and iOS devices. (Android 14 is not yet available.)
Benefits of Tap to Pay:
- Grow revenue through cashless payments taken directly via your mobile device
- A seamless integration with the Organizer app, so all your data and insights are kept in one place
- There’s zero hassle required to learn and set up new hardware
- Save on hardware costs
- Easy to set up and start accepting payments in minutes
- A seamless experience for your attendees; no waiting around for you to count cash and issue change
- Available to all event organizers in the US and Canada; anyone can participate
Check out Tap to Pay in your Organizer app.


