In the past, we’ve talked about how a great event image can help your event stand out, increase your event’s credibility and maximize your sales and registrations. We’ve even provided some useful tips to get you started.
This week, we rolled out a new and improved tool making it easier for you to add the main event image to your page.
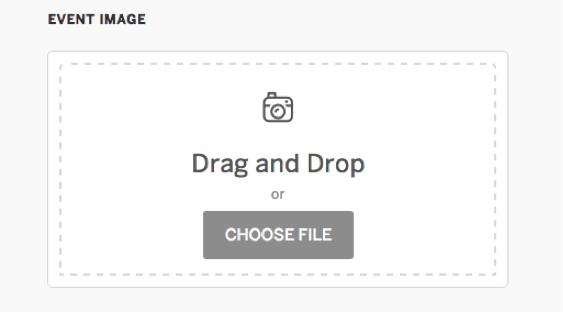
Drag and drop your image
With the new tool, you can simply drag your photo over the Event Image section on the Edit/Create page and it will automatically start to upload the image. We currently have a 2MB image size limit, so you’ll need to shrink the image if it’s any bigger. (As of July 2015, we’ve increased the size limit to 10MB, so go ahead and add that high-resolution photo!)
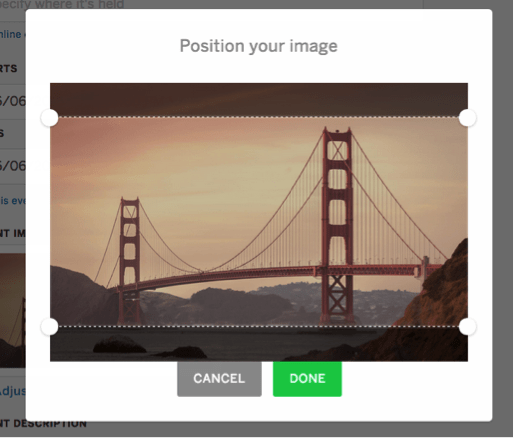
Easily crop to the right size
Once you’ve uploaded your image, you’ll need to position the overlay to create the optimal 2:1 aspect ratio image (e.g. 800 x 400 px). This will help us showcase that image representing your event across the rest of our site (see more details below). If you’ve got a great image that you want to use that isn’t exactly the right image size, you can save the image with a 2:1 box drawing, and then upload it. Here are some additional tips for choosing the right image size.
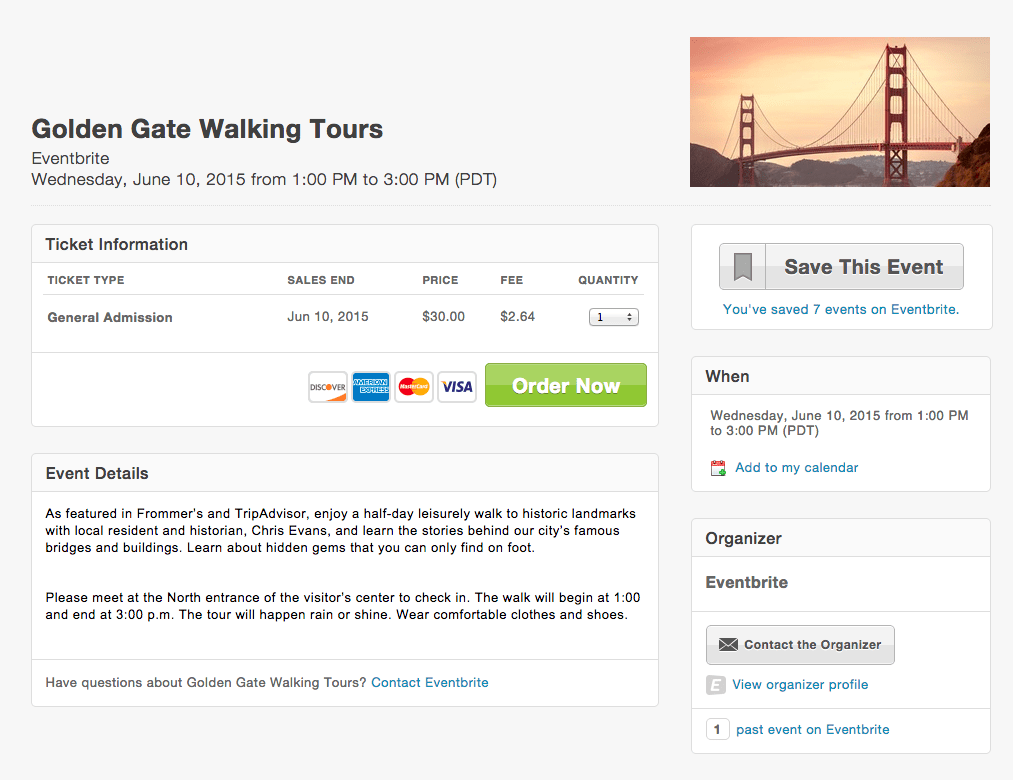
Where you’ll see this image
Over the next few weeks, we’ll be pulling in your new 2:1 event image into your Event Card on our homepage, directory, and app, alongside the basic information about your event. It’ll also become the main hero image for new event listings that we launched this week. Stay tuned for more updates!
This is the Classic event page design
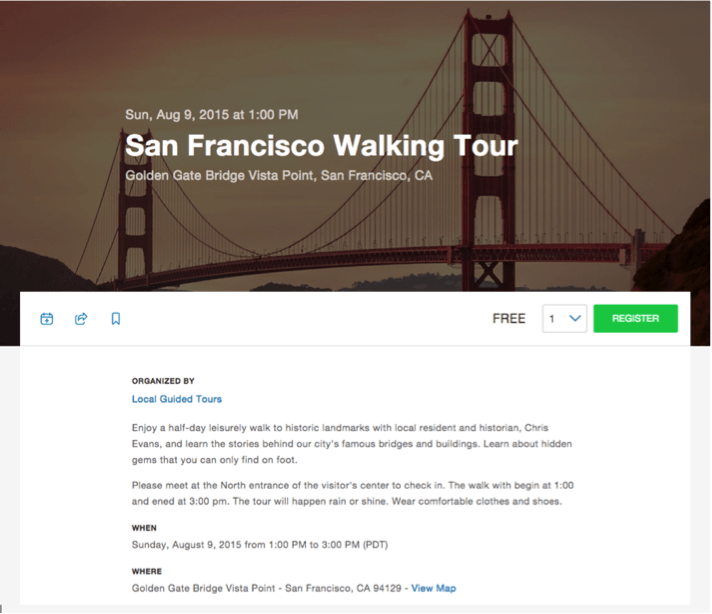
This is the new event listings design