Setting up online registration for an event used to mean wrestling with clunky software that slowed sign-ups and resulted in people bailing halfway through checkout. The friction was real, and so were the lost ticket sales.
Eventbrite flips that dynamic. With our registration form template, your event website becomes a warm welcome instead of a warning sign. It’s also a data goldmine for future event planning.
Creators choose Eventbrite because we’ve made it easy for people to say yes. Read on to find out how to do online registration for events through our platform.
What makes an effective online event registration page?
The goal of your online registration page is simple. You want to turn interest into confirmed sign-ups. Here’s the difference between a high-converting form and one that sends people straight to the dreaded back button.
Keep it simple and fast
When it comes to registering for events, every extra click gives someone the chance to change their mind. Eventbrite’s optimized registration form reduces friction by putting important details front and center, including the event’s ticket price, date, time, and location. This helps attendees know exactly what they’re getting into before they scroll.
Our form is also mobile-friendly. People can register from their phones without pinching or zooming. Fast loading also supports better conversion because delays often cause drop-offs.
Sell the experience with strong visuals
We found that 82% of attendees prefer sign-up pages with images that capture an event’s vibe, and event listings with video see a 10% higher conversion rate than those without. That’s why Eventbrite lets you add up to 10 images, upload videos, and embed links to YouTube and Vimeo.
When you’re adding visuals, avoid text-heavy graphics that distract from the registration form. Don’t use stock images, and instead choose original images that showcase your event’s atmosphere. Highlight key features like the venue and food. When someone can picture themselves at your event, they’re halfway to checkout.
Request need-to-know details only
Nothing kills event registrations faster than having to answer a million questions to sign up. Research shows adding a fourth field to a simple three-field form drops completion rate by 5%.
Eventbrite collects names and email addresses and lets you build a focused registration form with conditional questions when needed. To avoid overwhelming people with irrelevant fields, ask only what supports your event planning. This may include dietary needs if you’re hosting a dinner or shipping details for wristbands.
Use mobile-friendly payment processing
Mobile wallets account for 54% of online purchases these days. They’re fast, familiar, and feel secure — what’s not to love?
At Eventbrite, we think this number will keep climbing. We support Apple Pay and Google Pay, so your registrants can grab their tickets with a quick tap and move on with their day.
Add embedded checkout
A recent study pegged the average cart abandonment rate at a whopping 70.22%, and surprise redirects are a major culprit. As soon as you send people somewhere unexpected to finish a purchase, they wonder, “Is this legit?”
Eventbrite’s embedded checkout keeps the entire process in one place on your event website. Our secure payment system handles the transaction without making your attendees question your morals.
We also make it easy to monitor your event’s financial aspects. You can track charges, invoices, and payout details in one place.
Ensure fast on-page loading times
Even waiting a few seconds for a slow page to load can tank your sign-ups. People’s patience online is basically nonexistent, and they expect pages to load fast. A tiny pause can snap someone out of the moment, sending your registrations off a cliff.
Eventbrite is optimized for fast and efficient loading. We keep your registration form moving at real-time speed. That means fewer drop-offs and a smoother path from interest to confirmation.
How to set up online event registration with Eventbrite
Getting your event up and running on Eventbrite is quick. Here’s how to do it.
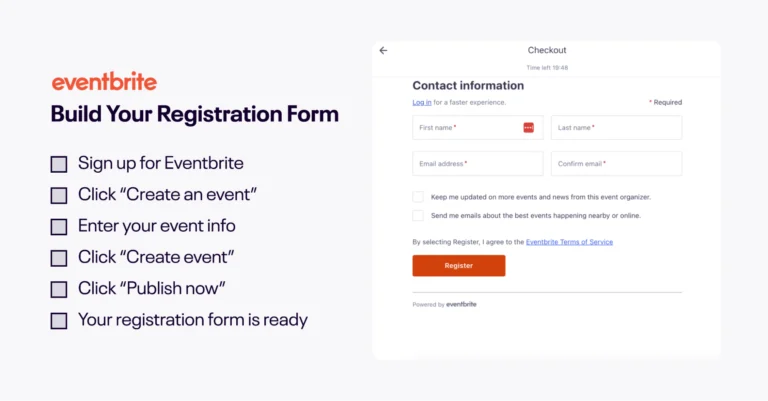
1. Create an event
Log into your Eventbrite account and click “Create Event.” Add the basics, like your event title, date, time, and location. Post an image or add a video to show off what makes your event worth signing up for.
If you’re hosting a virtual event, select “Online” as the location and go to “Online Event Page.” Fill this out to tell your attendees what they need to know after they sign up, such as where to watch a livestream.
2. Add the ticket types
Start by choosing how you want to price your event. You can set up paid, donation, or free event tickets. Then decide the cost and the sale window. Set the total number of tickets you want to offer. You can also create special tiers with their own pricing, like early bird or VIP, to match the experience you’re building.
Use the “Add-Ons” feature to bundle merchandise or special items with your ticket sales. It gives attendees something memorable and adds a little extra excitement. And yes, this is the perfect moment to unleash those new T-shirt designs.
3. Customize your registration fields
Tap “Order Options” and “Order Form” to create your attendees’ registration fields. Less is more here. Eventbrite already gathers names and email addresses, so focus on details you can’t live without.
Don’t forget to customize your event’s order confirmation page. Add some personality here and provide useful details not included on the event page, like parking instructions or where to go upon arrival.
4. Review the details and publish your event
Review and add your event’s organizer, type, category, tags, and privacy settings. Don’t forget to set your refund policy. When everything feels right, tap “Publish Now” to make your event live.
5. Manage your payments
Navigate to “Payments and Tax” within your event and click “Manage Payment Method.” Choose how you want to get paid. Credit card, PayPal, Google Pay, and Apple Pay are all great options. If you don’t change this setting, Eventbrite defaults to your recent payout method.
6. Promote your event
At this stage, your online registration is up and running on Eventbrite. Now it’s up to you to promote it.
Share the link across your social accounts and tell everyone you know what’s coming up. Use Eventbrite’s marketing tools to optimize your event for search and create promotional codes.
Why Eventbrite’s registration forms convert better
Eventbrite’s registration form is built to keep people moving, not second-guessing. It removes the usual friction points that cause drop-offs and keeps the flow feeling natural. Here’s how the experience helps more people reach confirmation.
Returning attendees check out in two clicks
Once a person registers for an event on Eventbrite, their information is saved for future sign-ups. So when they return to grab tickets, checkout only takes two clicks. This fast flow means fewer abandoned carts and helps build a loyal community over time.
Your buyer data works hard for you
The attendee information we save helps you build a community. You can use this data — like who attended your previous events — to offer targeted promotions for future events. It’s a strategic way to reach out without having to run a full outreach campaign.
You’ll know exactly where your sales come from
Eventbrite’s built-in attribution tracking shows what’s driving your ticket sales. You can see whether sign-ups came from that Instagram story you posted or the email blast you sent. Our real-time analytics reveal exactly where your traffic comes from, so you can make decisions with confidence.
Creating ticket types is easy
With Eventbrite’s ticketing platform, you can quickly create multiple tiers. You don’t need technical expertise to set up pricing, visibility, and sales windows. The interface is user-friendly, so you can cater to different types of attendees without trying to figure out complicated tools.
Your event gets discovered by people already looking
Here’s where we really separate ourselves from the pack. When you publish an event on Eventbrite, it goes live on our marketplace where millions search for things to do. Unlike a customizable form that just collects data, your event integrates with our search platform. This increases your visibility beyond your own audience.

Increase ticket sales with registration data
Our analytics give you a look at people’s behavior, like how many of them actually buy a ticket. This helps you spot and fix issues fast.
For example, you can track form drop-offs to see when people abandon ship. If it’s midway through a 10-question form, simplify it and see what happens.
Eventbrite’s detailed reporting also tells you how many people have seen your listing, how many tickets you’ve sold, and where your attendees came from. For example, if your analytics show that most of your attendees are from out of town, you can capitalize on this by partnering with a hotel or airline to offer special discounts.
Bonus: You can also import your attendee data into a third-party app for badge printing.
Level up your event management and registration with Eventbrite
Great events deserve an effortless registration experience. And with Eventbrite, you get the tools you need to streamline sign-ups for attendees and manage sales with confidence.
Get started today to build a registration page that helps you find your people.